How To: Barbell Squat
3 Golden Rules (Made Better!)
Today we’re going to go over the 3 golden rules for the barbell back squat. I also have a bonus rule at the end, so make sure you read the entire article!
Golden Rule #1: Always Go Ass To Grass! (ATG)
We’ve all seen the quarter squats in the gym, where someone loads up the bar with about 7 plates on each side, and they proceed to squat down about 1 inch. That is doing NOTHING. Then there are some of you who may only be going down halfway (to parallel) and coming back up, and believe it or not that’s actually placing more tension in your knees by stopping and then having to get things going at halfway, compared to going all the way down.
If you want to avoid acute or chronic pain in your knees, you need to teach your body full range of motion (ROM). Full ROM is going all the way down, keeping your chest up, ass to grass, and then coming all the way back up to the top on every single repetition. If you’re not able to go full ROM yet, obviously you might have some flexibility issues, but I do have another ARTICLE that can help with that.
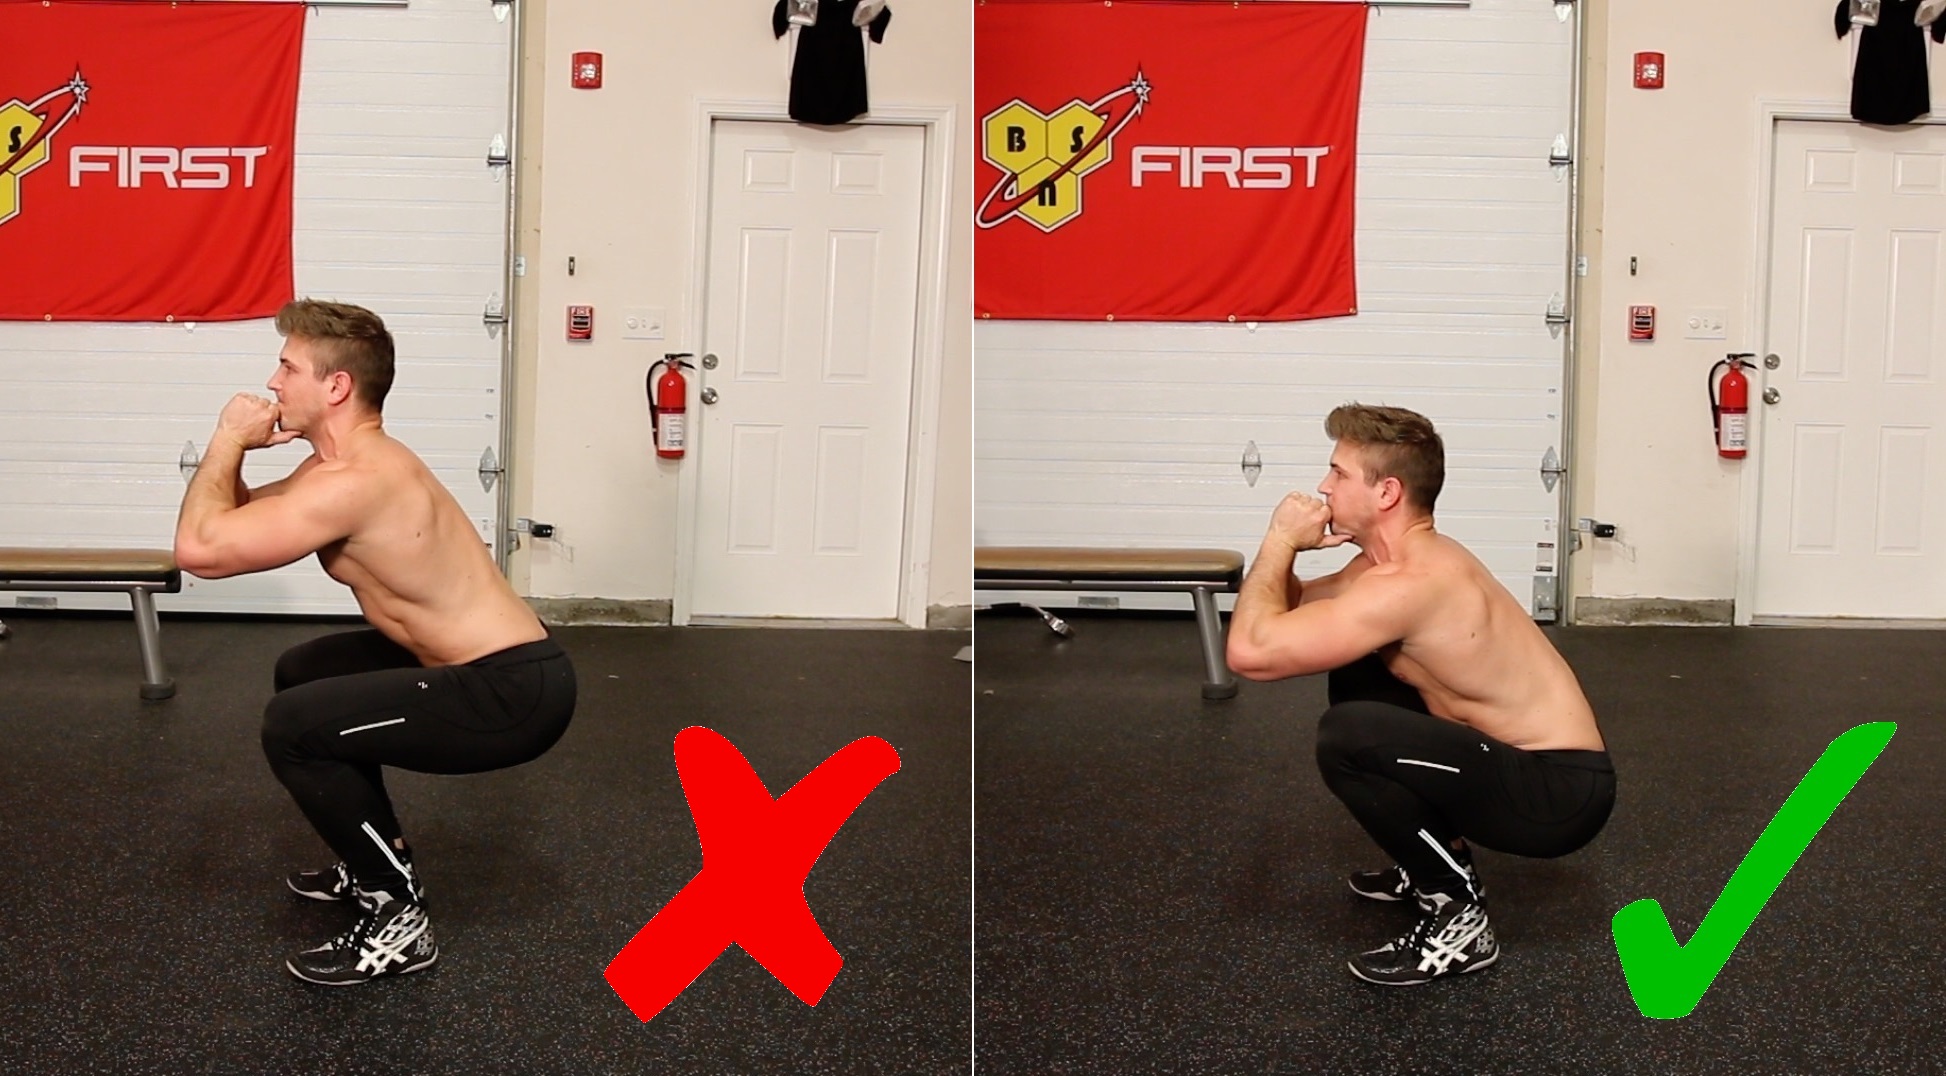
When I first started going true ass to grass squatting (all the way down, all the way up), I had to SIGNIFICANTLY lower my weight in order to be able to do that. Something you can do right now to see what it feels like to go all the way down, is put some weight on the bar (about 95lbs or 135lbs depending on how strong you are). Then go down into the bottom position, and try to move your feet around and see what feels the most comfortable to stay in that position, because your form is going to change when you go ass to grass. For me, I used to squat with my feet a little too close, and that was preventing me from going all the way down. So what I had to do was try different foot stances, and go all the way down, and adjust my body in the bottom position to get used to that to perform my reps.
Golden Rule #2: Push Through Heels / NOT TOES!
Again, proper ROM is ass to grass, but when you push up, you push through your heels, so that your feet stay flat the entire time. What often happens when people squat (usually in the beginning due to people having tight ankles or poor ankle flexibility), is that as they go down, the heels start to come off the ground, then they push through their toes to get back to the starting position. If you have poor ankle flexibility, you should probably address that before you start squatting heavy.
What can also happen is that maybe your ankle flexibility is good now, but because you were squatting wrong for so long and pushing through your toes, you’ve developed a faulty recruitment pattern where your body is used to recruiting certain muscles more during a squat. You should be recruiting a lot more glutes and hamstrings, but because you’re pushing through your toes, you’re recruiting a lot more quads and that might be pushing your knees in, causing valgus knee collapse, which can lead to a meniscus tear in your knee, and a lot of other injuries. You definitely don’t want that to happen, especially as you start squatting heavier and heavier weight. If anything, when you squat, you should be focusing on pushing your knees out, and then keeping your knees pushed out as you perform the movement to avoid valgus knee collapse altogether.
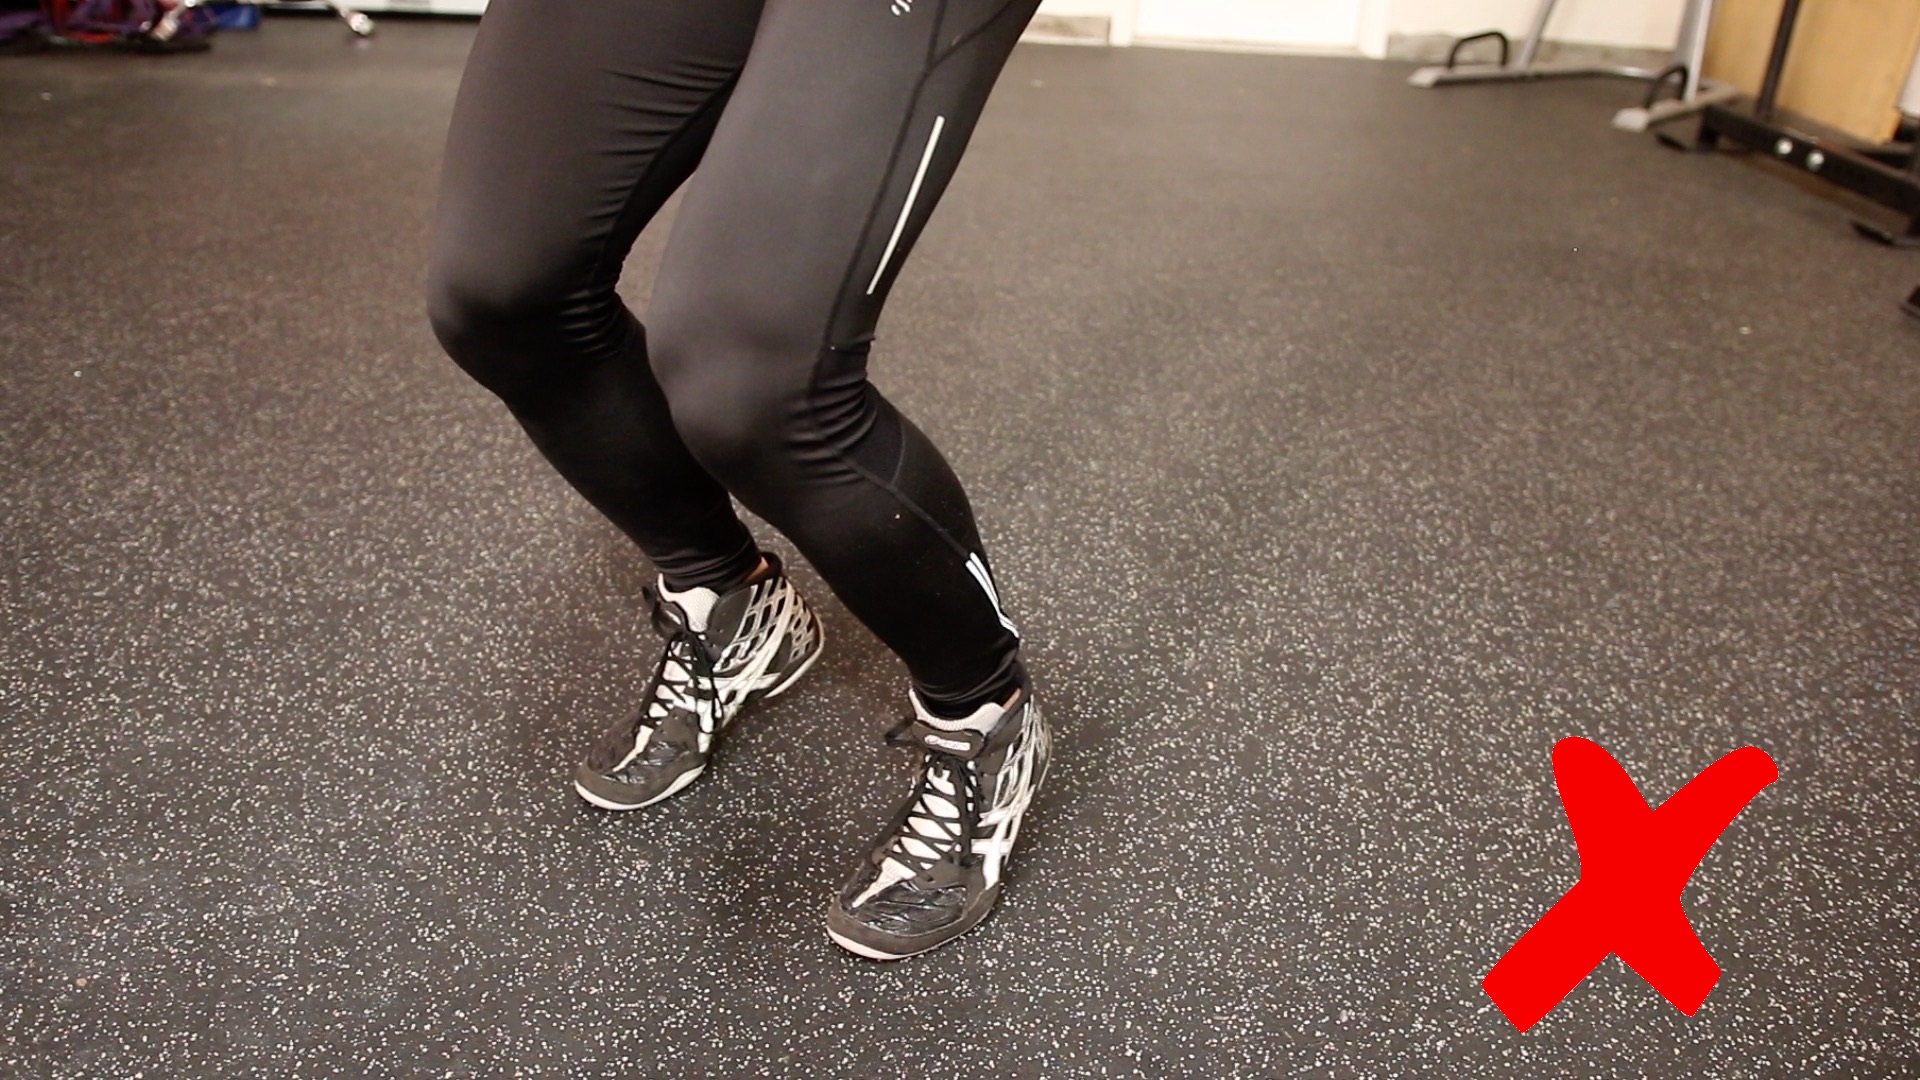
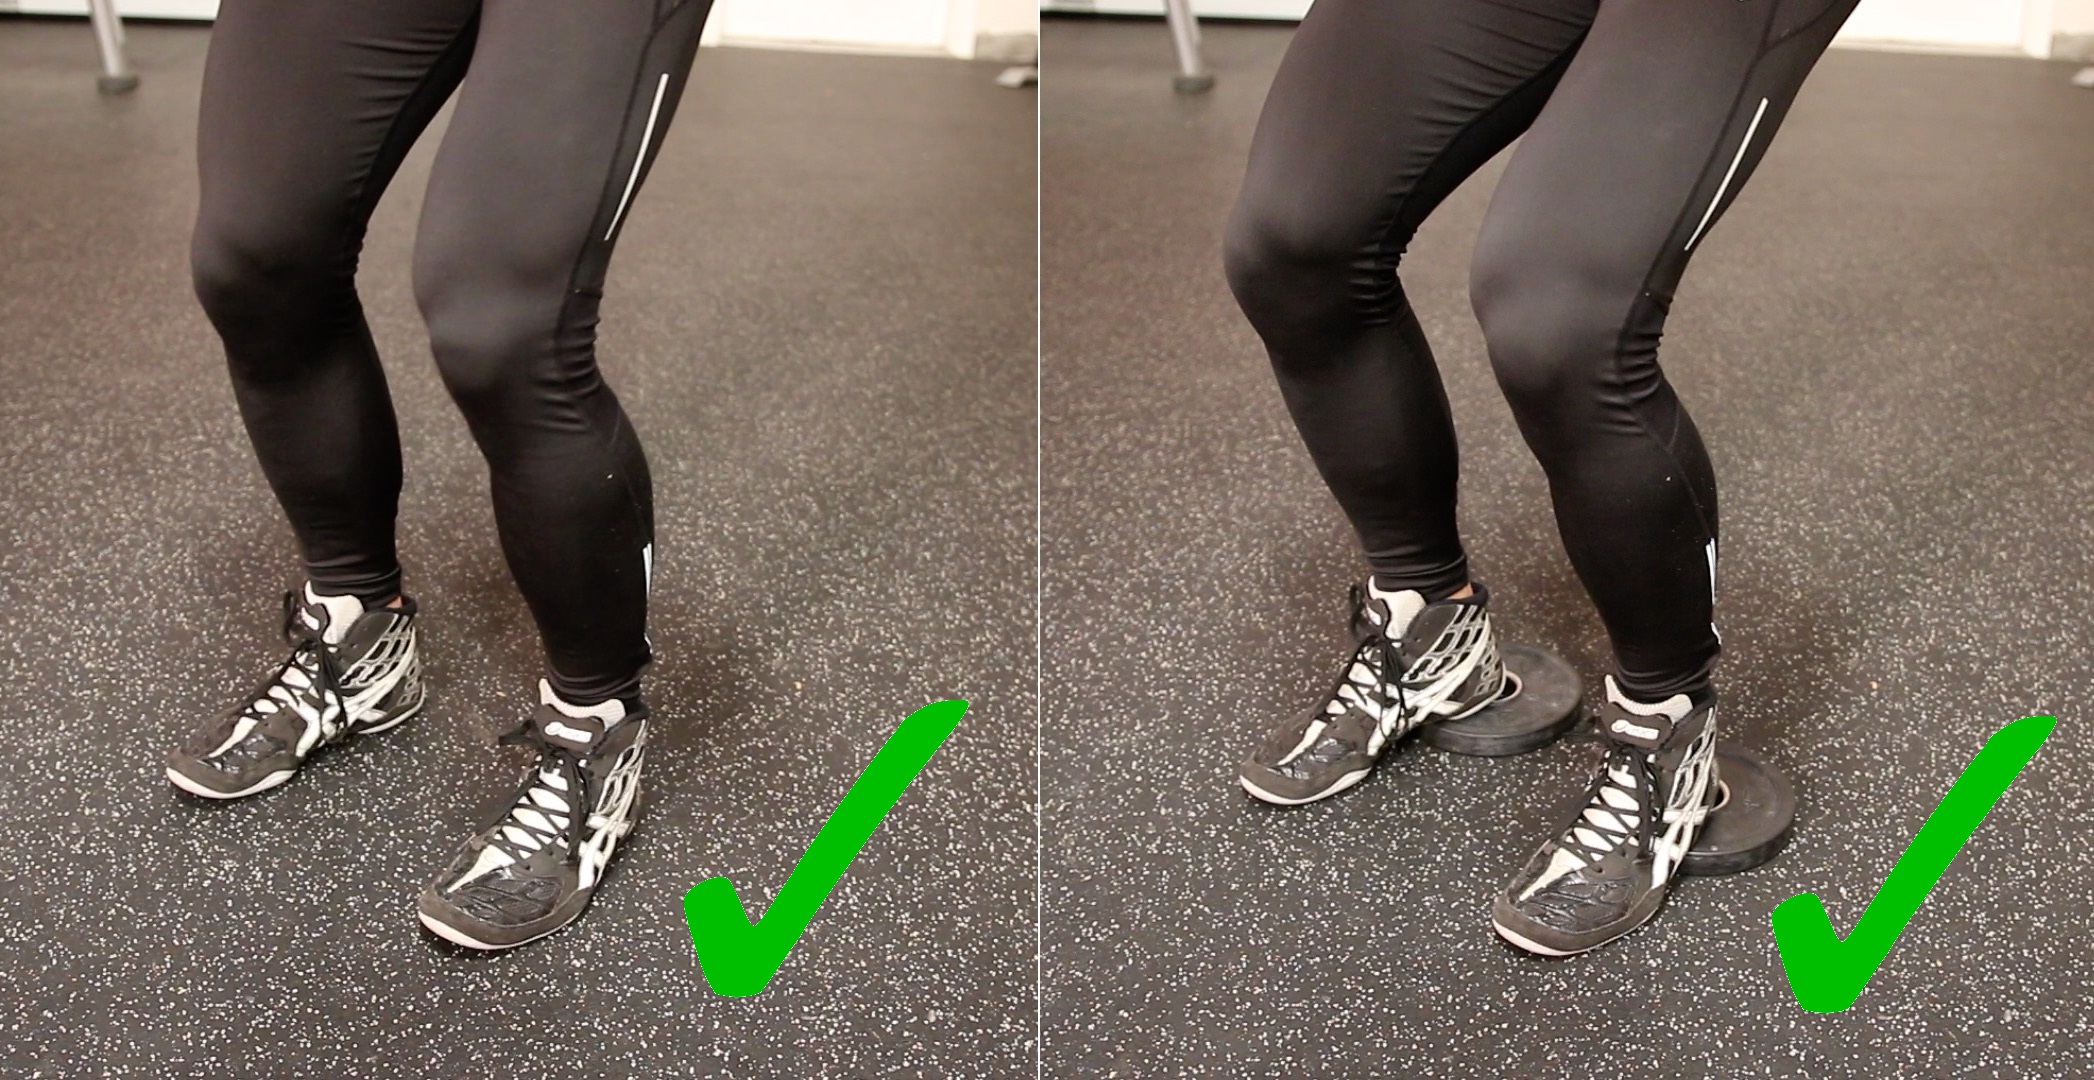
So how can you correct this issue if you’re starting to do it? The easiest way would be to get a pair of lifting shoes, because those are going to elevate your heels a little bit off the ground. If you don’t have lifting shoes, you can get a pair of 5lb plates (I wouldn’t go to 10lb plates, just stick to 2.5lb or 5lb plates), and you can put your heels on the plates. What that’s going to allow you to do is basically stay in that same movement pattern where if you were pushing through your toes, your heels would already be that high off the ground. The difference is going to be that now that your heels are that high off the ground naturally for a start, you can focus a lot more on pushing through your heels because you’re still basically in that same movement pattern, you’ve just transitioned the movement from pushing through the toes, to pushing through the heels.
Golden Rule #3: Knowing When To Breathe
Breathing might sound confusing to some of you because it can change per exercise, but the basis is always the same. If you’re doing circuit-style workouts that don’t require heavy lifting, you can pretty much just breathe regularly throughout the whole workout no matter what ROM you’re in or what part of the movement you’re in, just breathe normal. But when it comes to lifting heavy weight, whether you’re doing a heavy squat, a heavy deadlift, or even a heavy bicep curl, this is what you want to keep in mind. You always want to have a tight, strong core, as you perform the movement.
If you’re doing a squat, and you’re in the top position, you should breathe in through your nose. As soon as you’ve breathed in that air, you’re going to keep your core nice and tight, flex everything, then go all the way down, all the way back to the top, and you’re not going to reset your breath until you get back to the top of the movement. You can hold your breath and do a few repetitions in a row, or you can do them one at a time – everyone’s different. However, the one thing you NEVER want to do is breathe out at the bottom of the movement.
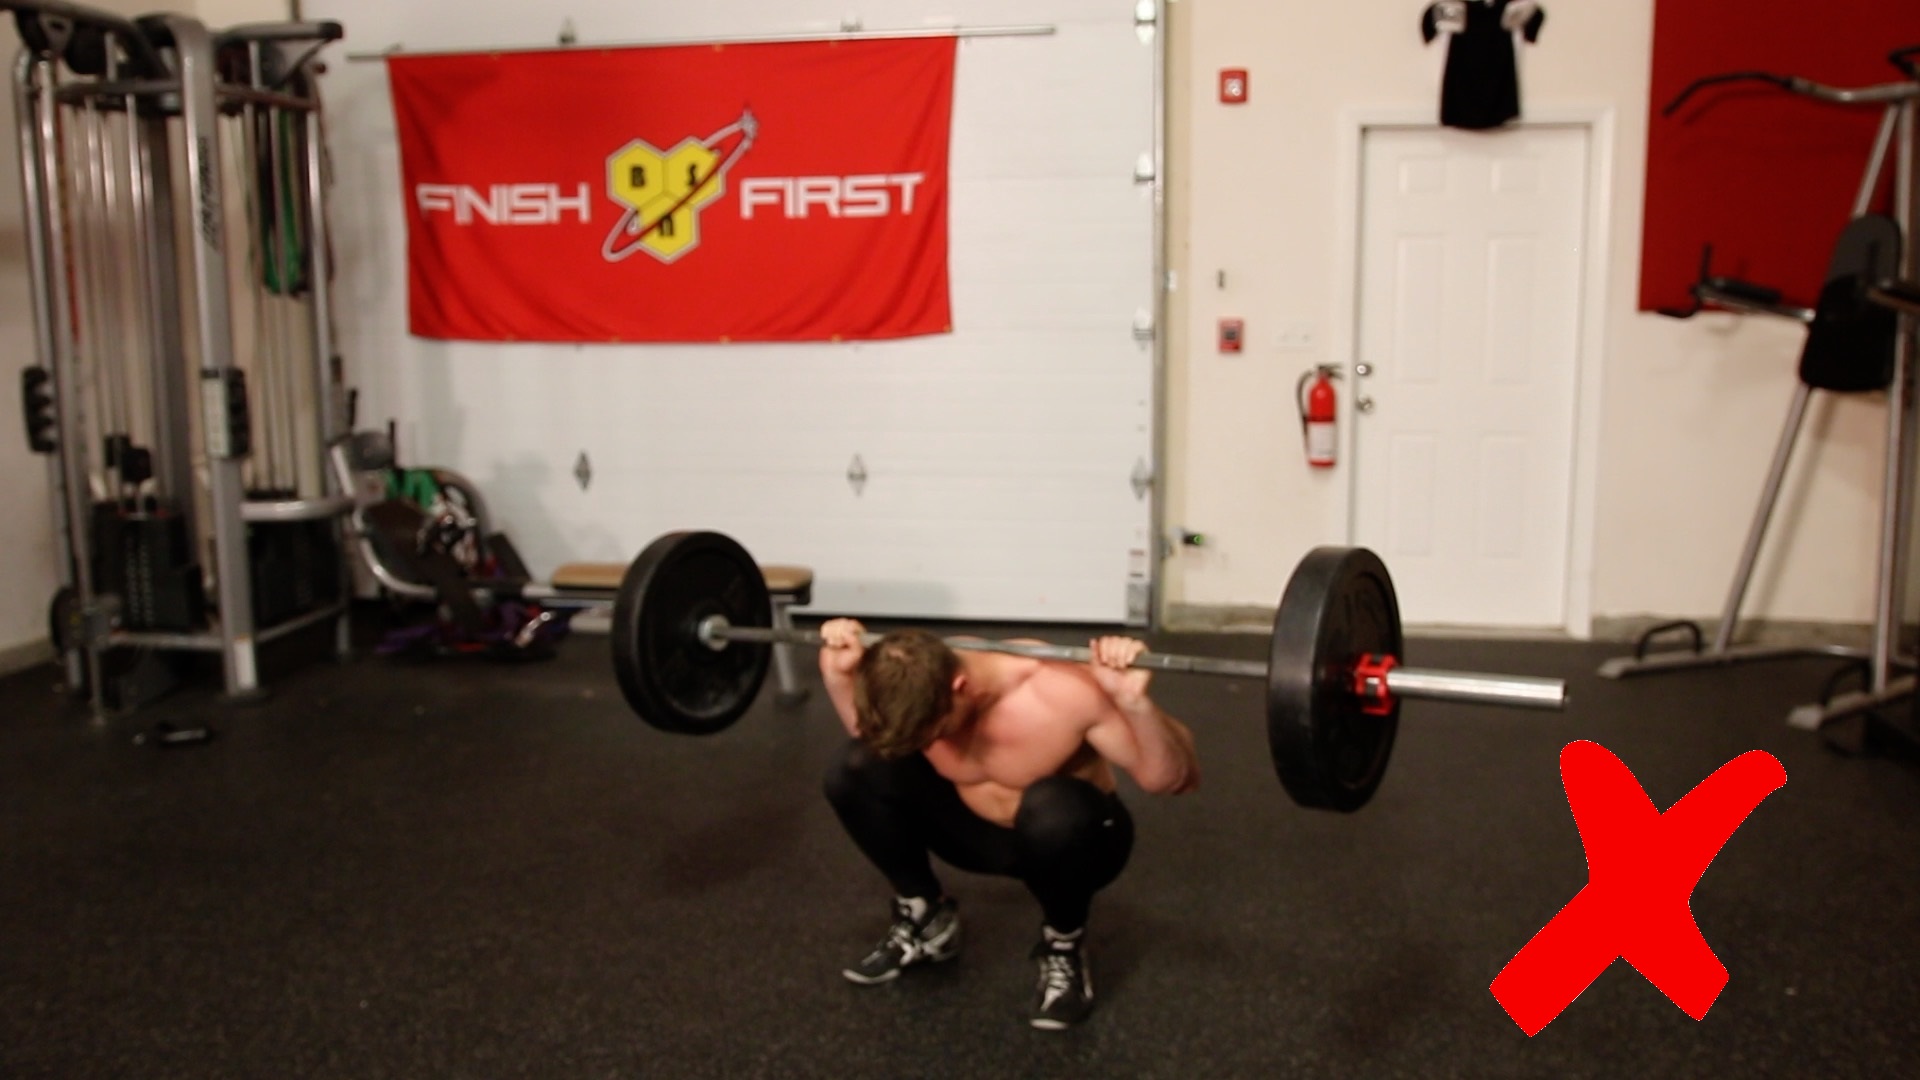
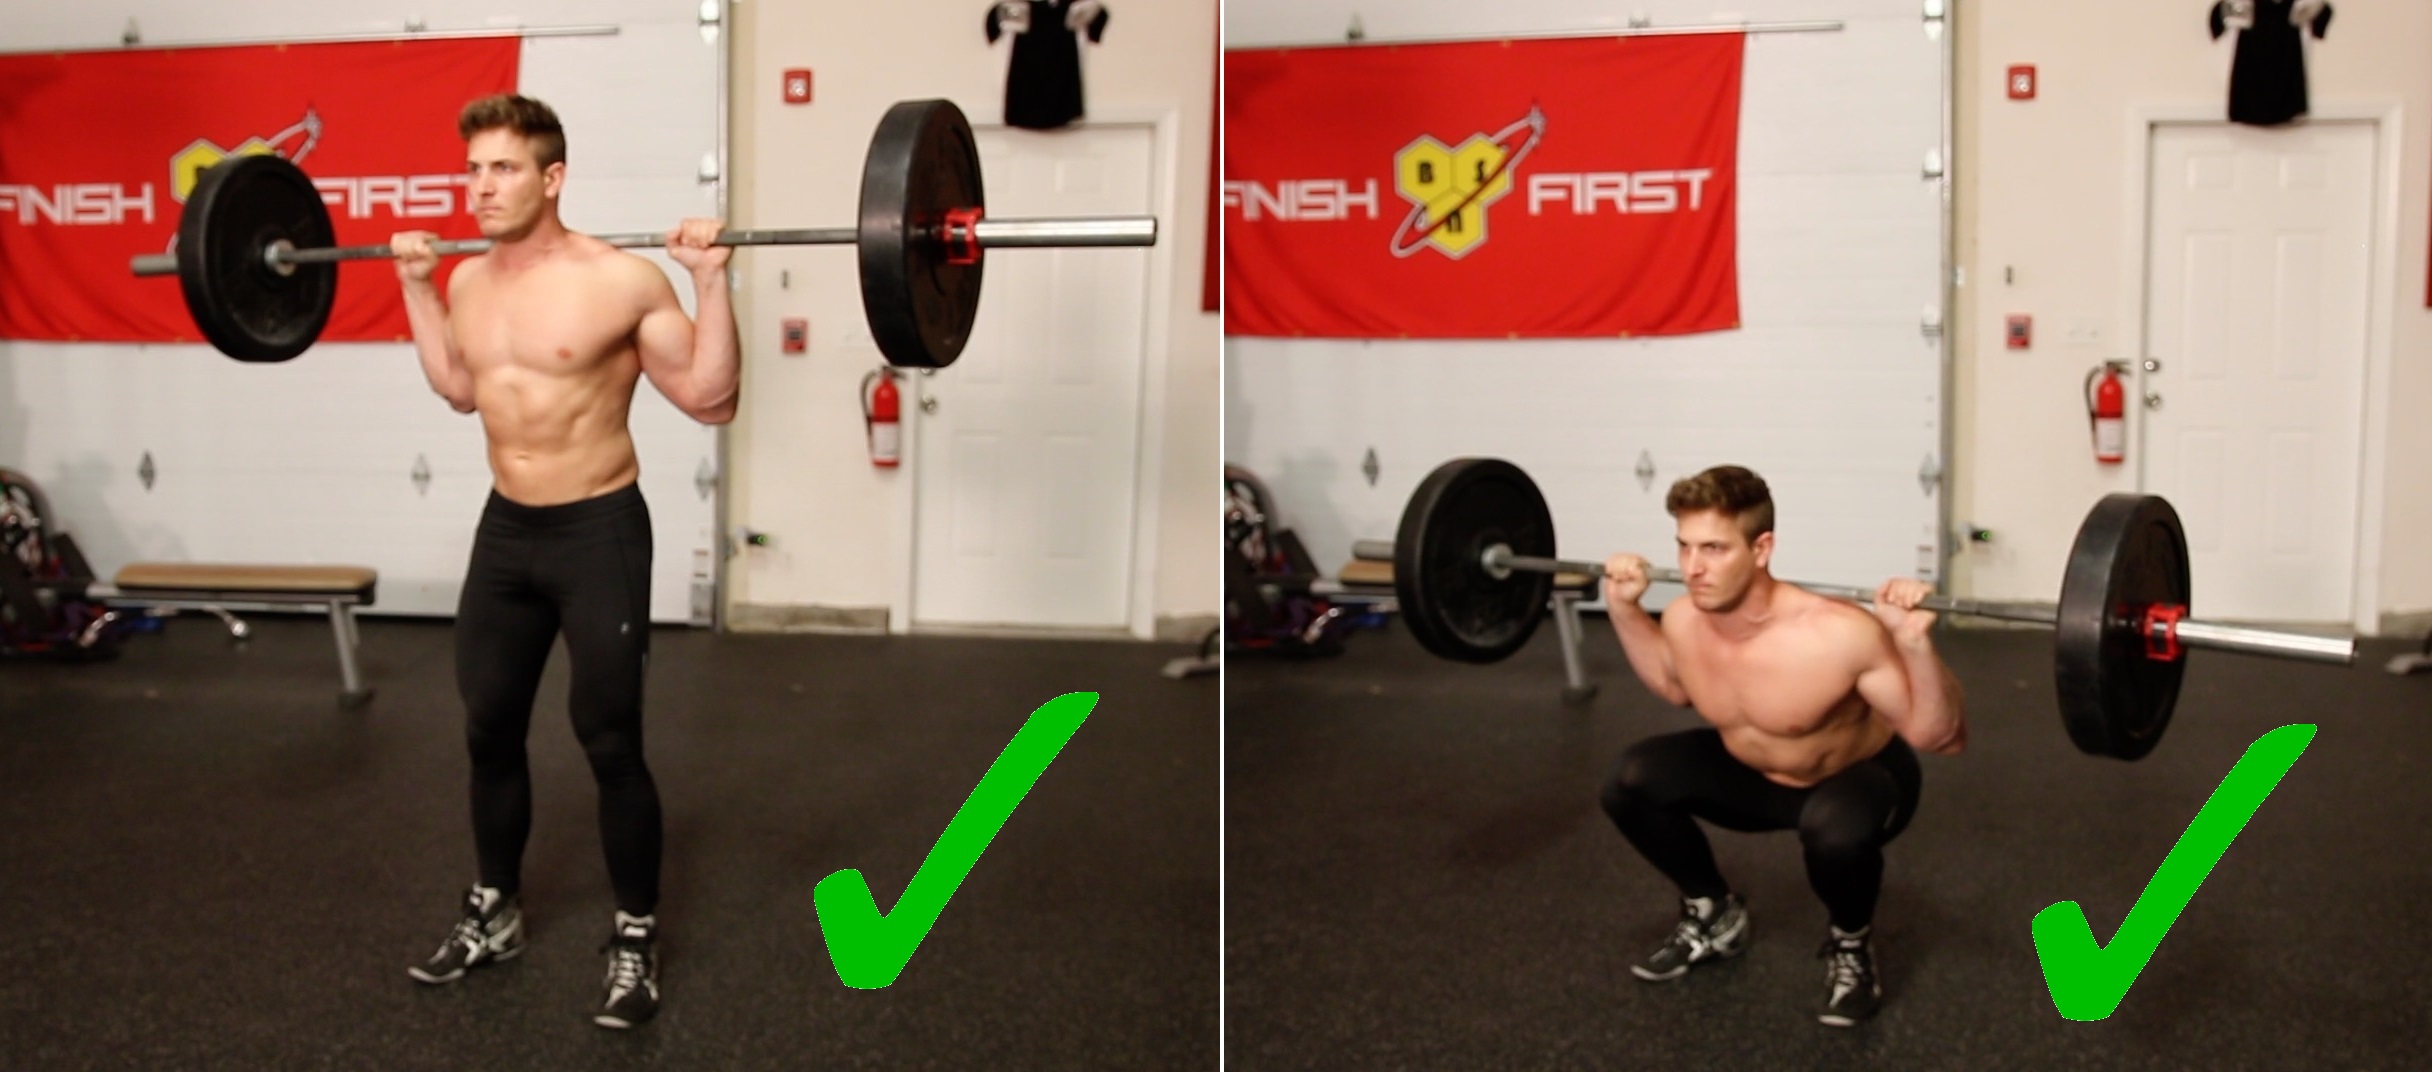
Your core is the only thing that is keeping your upright. If you take in that breath, go all the way down to the bottom position (with, say, 300lbs on your back), and you breathe out, you go into spinal flexion, and now you’re out of luck. Unless you have some racks there to help you, you’re going to have to drop the weight on the ground because in that position, you’ve lost all your core control, and you’ve lost all that power you need to get back to the top of the movement.
BONUS TIP: Always Warm-Up Your Shoulders!
You should always have your shoulders warmed up before you start squatting. Granted you should have your shoulders warmed up before you do any type of exercising, but especially when squatting. Now you might be thinking ‘But I’m not working my shoulders when I squat, so why should I warm them up?’ For most people, you can only bring your arms back so far naturally, and in that position, it’s not correct if you want to be holding a bar for squatting. When you’re squatting, your hands have to go back another 3 – 4 inches from that natural stopping point, and they have to get pulled back really far in order to hold that barbell in place. That means there is a lot of tension on the shoulders, and if you have tight shoulders, it’s going to cause a lot of discomfort, especially as you start lifting heavier weight for reps. That would mean you’re probably not going to be able to do as many reps, because you’re going to want to get rid of that bar as fast as possible.
However, you can solve all of that with a simple shoulder warm-up. You probably already know that my favorite shoulder warm-up is shoulder breakers. All I do is go forward and back 10 – 12 times, for a total of 2 sets. Then I will also do my warm-ups in-between my sets. A lot of people have this mentality that you do your warm-up before you workout, and then you never warm-up ever again. Believe it or not, you can actually increase your flexibility even more (especially if you have tight muscles), by doing more warm-up sets and reps in-between all of your squats. If you have tight shoulders, do a quick warm-up before you get started, but don’t be afraid to do 1 extra set in-between all of your squat sets as well.
Conclusion
I hope these 3 golden rules help you take your squat training to the next level! And if you’re looking for a new program, make sure you check out my Cheat & Recover Program to take ALL of your gains to the next level! It combines high volume with overloading, and it’s going to give you a workout like you’ve never seen before, and you’re going to love the gains!


